1. Click the WordPress icon in the Softaculous Apps Installer at bottom of CPanel.

2. Click the "Install Now" button.

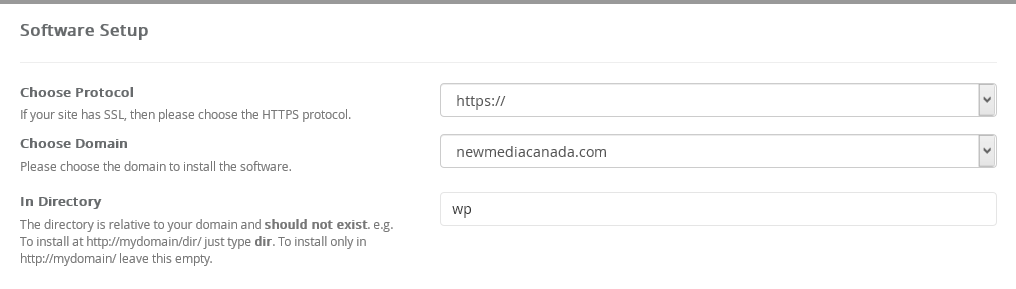
3. Choose Protocol: Select http:// if unsure. https:// is for sites that have an SSL certificate. https:// is preferred for best security.
4. Choose Domain: If you have more than one domain in your CPanel you can select which domain you want this install for.
5. In Directory: Leave this blank to install in the web root of the domain. If you want it in a subfolder under the web root then enter the folder name here.
6. Site Name and Site Description can be changed later in the WordPress Admin.
7. Enable Multisite: Our servers support WordPress Multisite. Important: If you plan to use Multisite, then it must be in the root directory. If you left ‘wp’ in the ‘In Directory’ field then go back and delete it now. Multisite allows multiple WordPress sites under one Admin login. This saves time when switching between sites because you dont have to login to each one.
8. Admin Account: Enter something other than the default "admin" for better security.
9. Admin Password: Click the key icon to generate a secure password.
10. Admin Email: The email address should actually exist and be monitored regularly.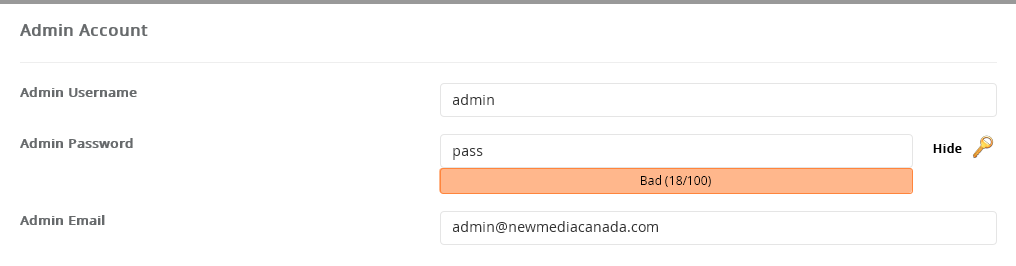
Choose Language: The language can be changed later in the WordPress Admin
Select Plugins: It is important to check "Limit Login Attempts" to protect against Brute Force Attacks. WordPress is very popular and this makes it a target for exploitation.
11. Database Name and Table Prefix: These don't ususally need to be changed.
12. Disable Update Notifications: This should not be checked. WordPress will automatically update itself and it's a good idea to check the site when this happens to make sure nothing went wrong during the auto update.
13. Auto Upgrade: Recommended to check this.
14. Auto Upgrade WordPress Plugins: Recommended to check this.
15. Auto Upgrade WordPress Themes: If you have customized one of the themes that comes with WordPress this could overwrite your changes, so you might not want to check this.
16. Backup Location: Set a custom path here if you wish. Automated backups have been disabled because they can cause problems on the server, but manual backups are possible.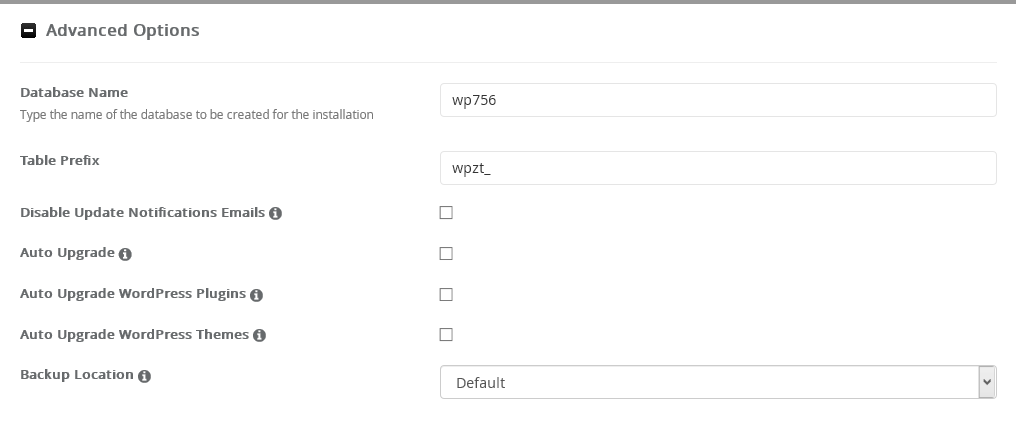
17. Select Theme: The Theme (design template) can be changed later. WordPress comes with a few Themes built in, but won't include the Themes shown here. If you see one you like here, best to select it now and have it included in the install. There are many places to find WordPress themes besides here.
18. Final Step: Fill in your email address to receive details of the install. This can be handy but, since this email will contain potentially sensitive information it may be best not to leave in your email account. Click the Install button to start the installation process. Softaculous will show you the progress and tell you when complete. Important! Do not browse away from the installation progress page until the install is complete.
